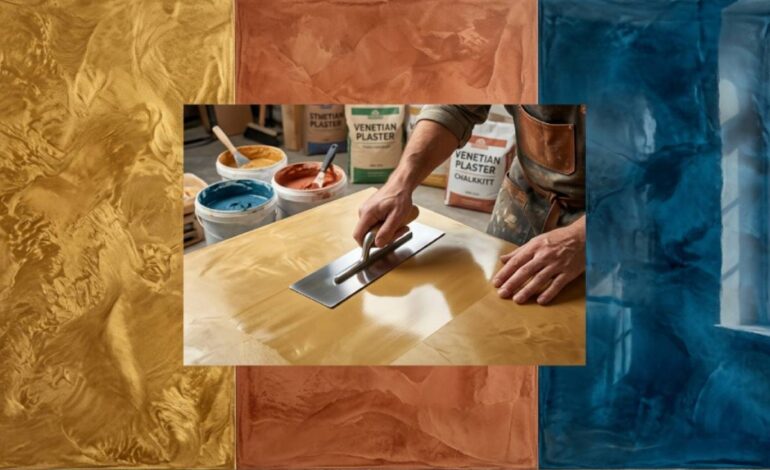
Venetian Plaster: What It Is and How to Apply It
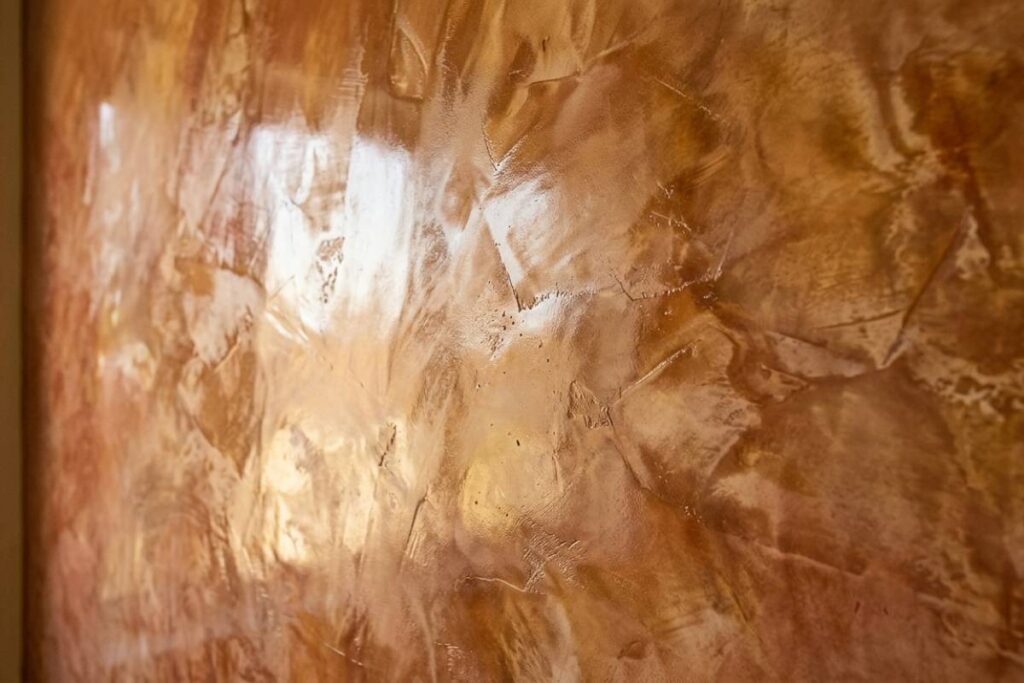
Run your hand across a wall finished in Venetian plaster, and you’ll feel something paint will never replicate: a surface with the cool solidity of marble, built from nothing but lime and stone dust. That tactile quality is exactly why this 2,000-year-old technique is showing up in contemporary Australian homes, high-end hotels, and design-forward commercial spaces.
The problem is that most people asking “what is Venetian plaster?” have already seen a wall they love and want to know if they can achieve it, without the guesswork or the contractor’s invoice. The technique looks complex. It doesn’t have to be.
If you get the prep wrong, the whole finish fails. If you rush the burnishing step, you lose the signature sheen. This guide covers both what Venetian plaster actually is and the exact process to apply it correctly, so you can make a confident decision before you pick up a trowel or call a tradesperson.
What Is Venetian Plaster?
Venetian plaster is a decorative wall finish made from slaked lime (calcium hydroxide) and finely ground marble dust, applied in thin, overlapping layers and burnished to a smooth, stone-like surface.
The Romans called the finished product Marmoratum Opus, meaning “smooth marble.” According to a peer-reviewed study published in Evolutionary Human Sciences (Cambridge University Press) and indexed by the U.S. National Library of Medicine, high-quality lime plaster technology was already in use at least 12,000 years ago in the southern Levant, making it one of humanity’s oldest engineered building materials.
The technique gained its name during the Renaissance in Venice, where artisans used it to replicate the look of stone in a city built on soft foundations. Marble slabs were too heavy. Venetian plaster gave architects the same visual depth at a fraction of the weight.
Modern versions often include acrylic polymers to improve durability and workability. Authentic lime-based formulations are still available and remain the preferred choice for breathability, longevity, and low VOC output.
How It Works Chemically
When the lime-based plaster is applied and exposed to air, it undergoes carbonation: calcium hydroxide reacts with CO₂ to form calcium carbonate, which is essentially limestone. The wall, over time, mineralises. That is why a properly applied Venetian plaster finish can last decades and become harder with age, unlike paint, which begins to degrade from the day it dries.
The Three Main Types
Not all Venetian plaster is the same product. The term covers a family of finishes. Knowing the difference matters when you’re specifying a product or briefing a tradesperson.
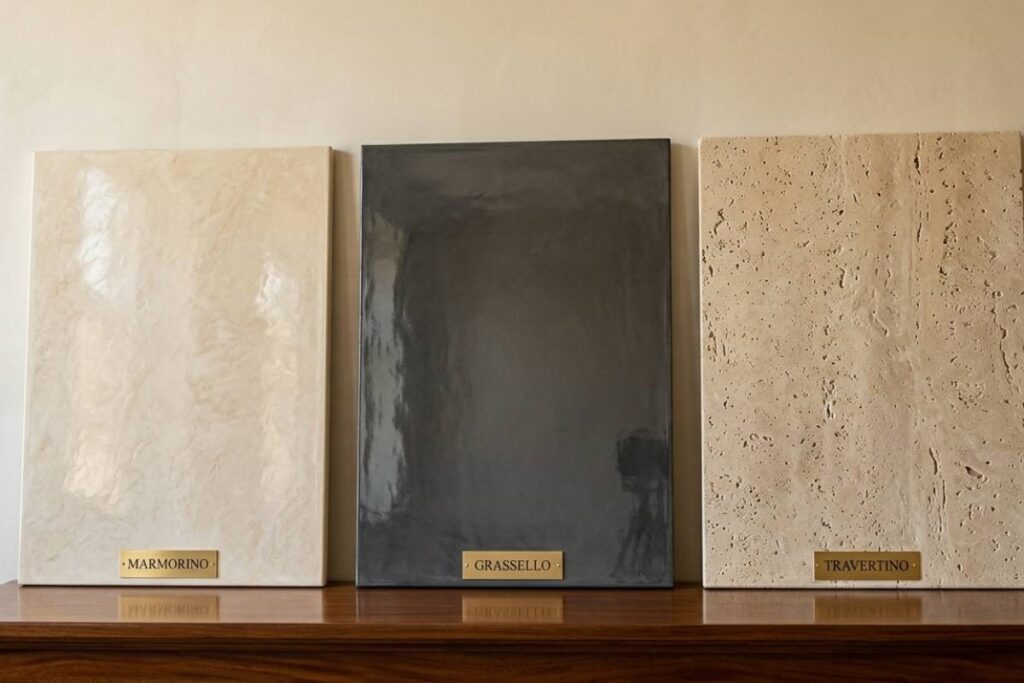
Marmorino
The most widely used type. Made from crushed marble and aged lime putty. It produces a smooth, semi-polished surface with subtle natural variation. Suitable for walls and ceilings, matte to medium sheen. The name derives from marmo, Italian for marble.
Grassello (Stucco Veneziano)
The highest-gloss formulation. Uses lime putty that has been aged for a minimum of six months, sometimes years. When burnished, it achieves a near-mirror finish. This is what most people picture when they say “Venetian plaster.” It requires more skill to apply than Marmorino.
Travertino
A textured variant that replicates travertine stone. Unlike the other two, it intentionally retains pitting and void-like marks from the trowel work. The result is a heavier, more rustic appearance, often used in Mediterranean and coastal interiors.
Venetian Plaster vs Other Wall Finishes
| Feature | Venetian Plaster | Standard Paint | Cement Render |
| Composition | Lime + marble dust | Acrylic or water-based polymer | Cement, sand, water |
| Finish depth | High (3D, light-reactive) | Flat | Medium |
| Durability | 20+ years when sealed | 5-10 years | 15-25 years |
| Breathability | Yes (lime-based) | No | No |
| VOC level | Low (lime) to moderate (acrylic) | Low to moderate | Very low |
| Moisture areas | Yes (with sealant) | Limited | Yes |
| DIY difficulty | Medium-High | Low | High |
| Cost (AUD/m²) | $150-$250 (pro) | $15-$40 (paint + labour) | $60-$120 (pro) |
| Repairability | Patchable if matched | Easy | Difficult |
The critical difference is not just aesthetic. Lime-based Venetian plaster allows moisture vapour to pass through the wall, which matters in Australian coastal and subtropical climates where trapped moisture behind impermeable wall coatings is a documented driver of mould growth inside wall cavities.
Where It Works (and Where It Doesn’t)
Good applications:
- Feature walls in living rooms, entryways, and bedrooms
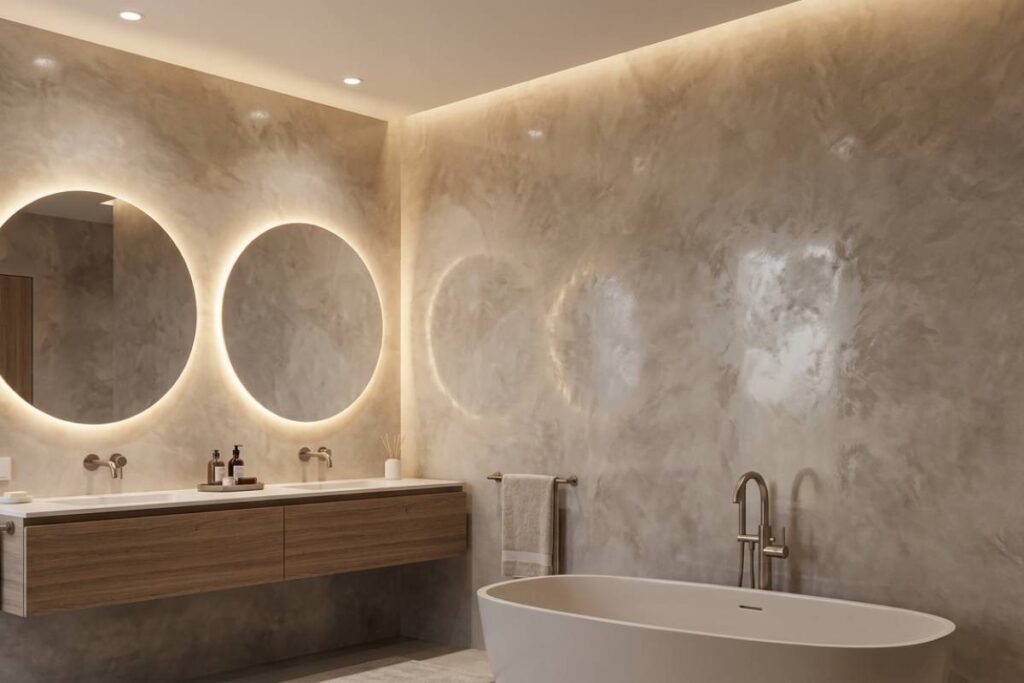
- Bathroom and kitchen splashbacks (with appropriate waterproof sealer)
- Columns, archways, and curved surfaces where stone cladding would be impractical
- Commercial spaces: hospitality, retail, reception areas
Poor applications:
- Surfaces with active movement or structural cracking (stabilise these first)
- External walls exposed to driving rain (unless a specialist exterior formulation is used)
- Over MDF with melamine coating (adhesion failure)
- Walls that haven’t been finished to at least a Level 4 standard
How to Apply Venetian Plaster: Step-by-Step
Tools and Materials
- Stainless steel Venetian trowel (4″, 6″, and 8″)
- Hawk or hand board for holding plaster
- Fine-grit sandpaper (400-600 grit)
- Lint-free cloths
- Lime-compatible primer
- Venetian plaster (your chosen type)
- Carnauba wax or specialist lime wax for sealing
- Painter’s tape and drop sheets
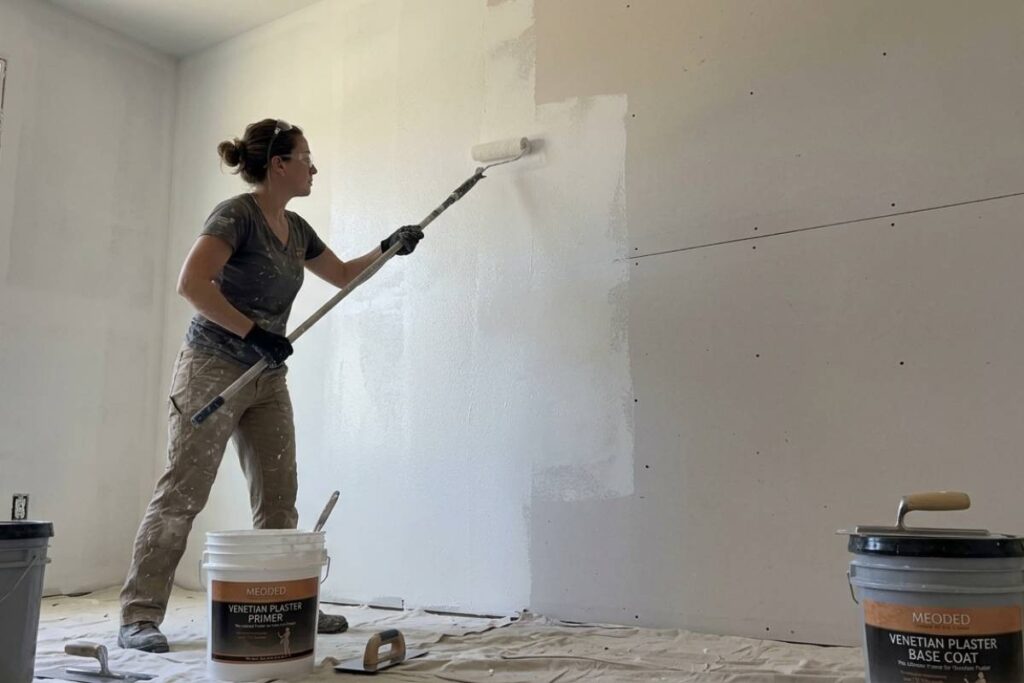
Step 1: Prepare the Surface
This step determines 80% of your result. Skip it or rush it, and nothing downstream will save you.
Fill all cracks and holes with appropriate filler, then sand smooth. Clean the wall of dust, grease, and any loose paint. If applying over plasterboard, the surface must be finished to Level 4 (fully coated and sanded flat).
Understanding the correct painting and decorating sequence matters here because Venetian plaster must be the final surface treatment, applied only after all electrical, plumbing, and cornice work is complete.
Lightly sand any glossy surfaces with 180-220 grit sandpaper to create mechanical adhesion. Apply two coats of a lime-compatible primer or a rolled coat of paint sealer. Let the second coat cure fully, minimum 24 hours.
Step 2: Mix and Load Your Trowel
Pre-mixed Venetian plaster products require only stirring. If you’re using a dry product, mix to a smooth peanut-butter consistency with no lumps.
Load a small amount onto your trowel, roughly the size of a golf ball. Work with less than you think you need. Thin layers are the entire point.
Step 3: First Coat
Hold your trowel at a 15-30 degree angle to the wall. Apply plaster in long, sweeping strokes with random direction changes. The goal is not full coverage. You are creating a textured base for the second coat to grip.
Work in manageable sections of around one square metre. Avoid stopping mid-wall; it creates visible edges. Keep a wet edge and blend each section into the previous one.
Allow to dry 4-6 hours before proceeding.
Step 4: Second Coat
Apply the second coat in a cross-hatch pattern over the first. The random overlapping strokes are what create the characteristic depth and movement of the finished surface.
While the plaster is still slightly damp, use your trowel flat to skim over the surface, smoothing down any ridges or high spots. Vary pressure to create tonal variation. This coat builds the visual character of the wall.
Allow to dry fully, 6-8 hours.
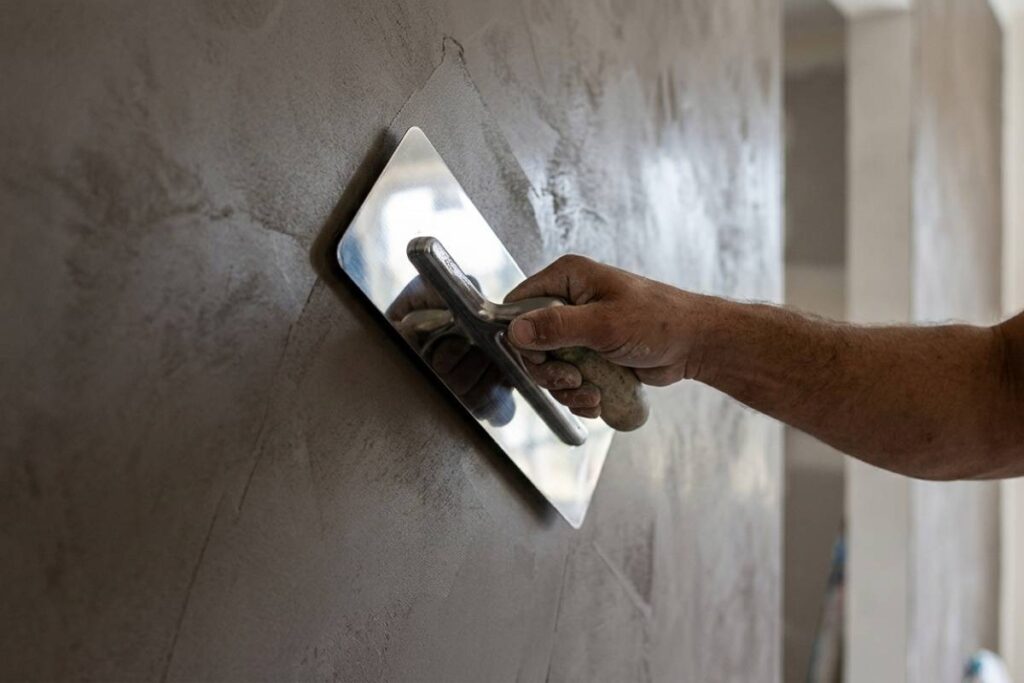
Step 5: Burnish
This is where Venetian plaster earns its reputation. Burnishing is the process of compressing and polishing the surface with a steel trowel to create sheen and hardness.
Sand the dried second coat lightly with 400-grit sandpaper. Remove all dust with a dry cloth. Using the flat of your trowel, apply firm, circular pressure across the wall surface. The friction generates heat, which compresses the lime particles and creates the characteristic polished finish.
The harder and faster you burnish, the higher the sheen. For a Marmorino finish, light burnishing produces a satin result. For Grassello, repeat the burnishing process two to three times, sanding lightly with 600-grit between passes.
Step 6: Seal
Allow the burnished surface to cure for a minimum of 48 hours. Apply a thin coat of carnauba wax or a specialist lime wax using a clean cloth or soft trowel. Work in small circles, allow 10-15 minutes, then buff to a finish with a clean lint-free cloth.
For wet areas such as bathrooms and splashbacks, use a dedicated waterproofing sealer rather than wax. Apply two coats, allowing full cure between each.
Common Mistakes That Ruin the Finish
Applying coats too thick. Thick applications crack as they dry and are impossible to burnish to a smooth finish. Thin layers, always.
Skipping surface preparation. Venetian plaster does not hide imperfections; it amplifies them. Any bump or depression in the substrate will telegraph through every coat.
Stopping mid-wall. Wet edges left to dry create hard lines that show in the final finish. Plan your sections to end at natural breaks: a corner, an architrave, or a ceiling line.
Rushing between coats. Venetian plaster needs time to partially carbonize before the next layer. Applying a second coat to a soft first coat causes delamination.
Under-burnishing. A wall that hasn’t been burnished enough looks chalky and dull. If the sheen is not where you want it after the first burnish pass, sand lightly and burnish again. It always responds to more work.
Using the wrong sealer in wet areas. Wax is insufficient for bathrooms and splashbacks. Use a purpose-made penetrating sealer rated for immersion exposure.
What It Costs in Australia
Professional Venetian plaster application in Australia typically ranges from $150 to $250 per square metre, depending on the finish type, number of coats, and location. Grassello commands the higher end due to the time required for multiple burnishing passes.
DIY material costs (plaster, primer, wax, sandpaper) for a feature wall of approximately 10 square metres run roughly $300 to $600, depending on brand and type. The primary variable is your labour time: a standard feature wall takes an experienced beginner one full weekend.
Factor in tool hire or purchase if you don’t already own a quality stainless steel trowel. A good Italian-made trowel suitable for Venetian plaster costs $60-$120 and will last a lifetime.
DIY or Hire a Pro?
| DIY | Professional | |
| Cost | $300-$600 (materials only) | $1,500-$5,000+ (full room) |
| Result quality | Variable; depends on preparation and technique | Consistent, high-quality |
| Time | 1-2 weekends | 1-3 days |
| Risk | Surface failure if prep or application is poor | Minimal |
| Best for | Single feature wall, hands-on renovators | Full rooms, complex surfaces, high-traffic areas |
For a single feature wall in a bedroom or living area, a patient DIYer can achieve a good result with the right preparation. For bathrooms, kitchens, or full-room applications where the finish must be consistent across corners, reveals, and ceiling junctions, a trained applicator produces a demonstrably better result.
If hiring a professional, ask specifically whether they work with lime-based Venetian plaster or acrylic formulations. Both are valid, but they have different performance characteristics. Lime breathes; acrylic does not.
For homeowners in Australia looking for a qualified applicator, Pro Plaster N Paint specialises in decorative finishes, including Venetian plaster. Getting a professional quote before committing to a DIY attempt is worth the phone call; most reputable plasterers will assess your surface and tell you honestly whether the substrate is ready, which saves you from discovering a prep problem mid-project.
Conclusion
Venetian plaster is a lime-and-marble-dust wall finish that creates genuine visual depth through layered application and burnishing. Whether you apply it yourself or engage a professional, the result depends almost entirely on surface preparation and patience during the burnishing stage. Get those two elements right, and the finish will outlast every coat of paint on your street.